Snow Photo: 5 Tricks!
Snow turns even the most ordinary landscape into a pristine, ethereal scene. But capturing its brilliance isn't as simple as pressing the shutter.
Snow photography introduces distinct challenges: extreme brightness, color distortion, and texture loss.
If you want to avoid dull, lifeless images and instead create photos that feel alive with winter magic, mastering these five essential techniques is a must!
1. Dial in Exposure Compensation to Avoid Gray, Dull Snow
In snowy conditions, cameras frequently underexpose because the meter reads the scene as overly bright. The result? Snow appears gray, not white.
What to do: Use exposure compensation, typically between +1 to +2 EV, depending on the amount of snow in the scene and lighting conditions. This tells your camera to overexpose slightly—restoring the snow's natural brightness.
Extra tip: Check the histogram instead of relying on the LCD. Aim for the graph to lean right, close to the highlight edge, but not clipped. If the histogram spikes hard on the right, you've likely lost detail in the snow—dial back a bit. Also, avoid matrix metering in pure snow scenes. Instead, switch to spot or center-weighted metering and measure off a mid-tone like a tree trunk or person's coat.
2. Use Custom White Balance to Eliminate Blue-Tinted Snow
Snow often reflects the color temperature of the light source, especially under shade or in early morning light. This can cause bluish or yellow casts that ruin the photo's realism.
How to fix it:
Auto white balance may struggle in snow scenes. Instead:
- Use a gray card to calibrate white balance on location.
- Manually set white balance to 'Daylight' (around 5200K) for neutral results on sunny days, or to 'Cloudy' (around 6000K–6500K) in overcast light.
Shoot in RAW for complete control. In post-processing, adjust the temperature slider until the snow looks crisp and neutral. Use the white balance eyedropper in editing software to sample a truly white area in the frame for correction.
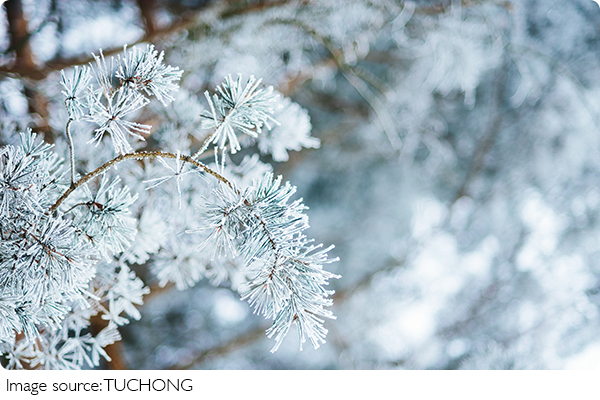
3. Enhance Surface Texture by Manipulating Shadows and Angle
Flat light in snowy weather can make everything blend together. Without contrast or shadows, your photos may look like a blank sheet of paper. You need to create texture.
Approach:
- Shoot during times when the sun is lower (morning or late afternoon) to get angled light. This casts shadows and reveals snow's surface detail—like individual flakes, wind-carved ridges, or footprints.
- Adjust your camera angle: get low to emphasize foreground patterns or shoot side-lit scenes to bring out contours in drifts and hills.
- In post-processing, increase clarity, texture, and dehaze sliders to highlight micro-contrast without over-sharpening.
4. Utilize Filters to Control Glare and Add Impact
Snow reflects up to 80% of light, making glare and flare common problems. Filters can correct these issues while unlocking new creative options.
Filters to try:
Polarizing filter: Minimizes glare and reflections from the snow's surface, deepens blue skies, and increases saturation—especially helpful in bright midday sun. Rotate it until you notice the sky or snow change appearance.
Neutral Density (ND) filter: Useful for long exposures in snow-covered areas. Smooth out waterfalls or rivers flowing through icy terrain, even in full daylight.
Graduated ND filter: Perfect for balancing bright skies and darker foregrounds when photographing snowy mountain ranges or wide landscapes.

5. Shoot Backlit Snow for Drama and Depth During Golden Hour
The best snow photographs often play with light. While front lighting reveals detail, backlighting introduces emotion and atmosphere, especially during golden hour.
How to use it:
- Position the sun behind your subject to backlight snow-covered trees, hair, or mist. This creates a halo effect and adds dimensionality.
- Look for blowing snow or falling flakes—backlighting will illuminate them, turning them into shimmering particles suspended in air.
- Use a wide aperture (like f/2.8 or f/4) to separate the subject from the glowing background. Combine this with a slightly underexposed shot to preserve the highlights around the edges.
Technical tips:
- Use spot metering on the subject, not the bright sky.
- Consider exposure bracketing to capture the full dynamic range. You can later blend exposures in editing.
- Keep a lens hood on to reduce lens flare, but leave some in intentionally if you want a dreamlike winter look.
Snow transforms the landscape into a canvas of light and contrast. But it also introduces technical hurdles that demand precision and control.
By mastering exposure compensation, white balance, texture-enhancement, filters, and golden hour lighting, you gain full command over how snow is represented in your images—turning fleeting winter moments into timeless photographs. These aren't just tips; they're tools to help you create snow scenes that feel as immersive and striking as the real thing!
12 Tips for Snow Photography || How to Take Best Photos in Snow
Video by PhotoJoseph
-
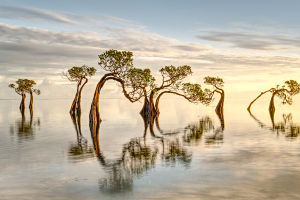 Lake Shots That Stun!Want Jaw-Dropping Shots? These Tips Will Take Your Lake Photography To The Next Level!
 -
 5 Violin Tips You Need!Want Better Sound Fast? These 5 Violin Hacks Will Totally Change Your Playing! Ready to Try?
 -
 5 Practical Flower: Try It!Messy Vase Or Perfect Flow? These 5 Steps Help Beginners Master Flowers With Ease!